Lesson 35: More pytest and continuous integration
(c) 2017 Justin Bois and Davi Ortega. This work is licensed under a Creative Commons Attribution License CC-BY 4.0. All code contained herein is licensed under an MIT license.
This tutorial was generated from a Jupyter notebook. You can download the notebook here.
Handling odd behaviors
To explore another feature of pytest, we'll consider another aspect of our n_neg() function. Specifically, what should we do if an invalid sequence is entered?
A sensible thing to do in this case is to make our software throw a RuntimeError.
Again, in designing our test, we need to think about what constitutes an invalid sequence. We'll only allow the 20 symbols for the residues that we used in previous lessons and present in the bioinfo_dicts.py module. So, we adjust our test function accordingly. We cannot use the assert statement to check for proper error handling, so we use the pytest.raises() function. This function takes as its first argument the type of exception expected, and a string containing the code to be run to give the exception.
A note on assertions vs raising exceptions
It is important to draw the distinction between assertions and raising exceptions in your code.
- You should raise exceptions when you are checking inputs to your function. I.e., you are checking to make sure the user is using the function properly.
- You should use assertions to make sure the function operates as expected for given input.
We should then alter the code of the test_seq_feature.py to include our expectation that the program should throw a RuntimeError if an invalid sequence is entered:
def test_n_neg_for_invalid_amino_acid():
    with pytest.raises(RuntimeError) as excinfo:
        seq_features.n_neg('Z')
    excinfo.match("Z is not a valid amino acid")
We also have to include import pytest at the beginning of the test_seq_feature.py file. It is clear that if Z is passed as the input sequence, the program should throw a RuntimeError saying: "Z is an invalid sequence". Let's test:
$ pytest -v
=============================== test session starts ===============================
platform darwin -- Python 3.6.1, pytest-3.0.7, py-1.4.33, pluggy-0.4.0 -- /Users/Justin/anaconda/bin/python
cachedir: .cache
rootdir: /Users/Justin/git/programming_bootcamp/2017/lessons, inifile:
collected 5 items

test_seq_features.py::test_n_neg_for_single_E_or_D PASSED
test_seq_features.py::test_n_neg_for_empty_sequence PASSED
test_seq_features.py::test_n_neg_for_longer_sequences PASSED
test_seq_features.py::test_n_neg_for_lower_case_sequences PASSED
test_seq_features.py::test_n_neg_for_invalid_amino_acid FAILED

==================================== FAILURES =====================================
________________________ test_n_neg_for_invalid_amino_acid ________________________

    def test_n_neg_for_invalid_amino_acid():
        with pytest.raises(RuntimeError) as excinfo:
>           seq_features.n_neg('Z')
E           Failed: DID NOT RAISE <class 'RuntimeError'>

test_seq_features.py:24: Failed
======================= 1 failed, 4 passed in 0.06 seconds ========================
Despite that all other four tests still pass, the last one fails because our program does not know yet how to throw a RuntimeError when it receives an invalid sequence as input. Let's fix that:
def n_neg(seq):
    """Number of negative residues a protein sequence"""

    # Convert sequence to upper case
    seq = seq.upper()

    if seq == 'Z':
        raise RuntimeError('Z is not a valid amino acid.')

    # Count E's and D's, since these are the negative residues
    return seq.count('E') + seq.count('D')
re-running the test:
$ pytest -v
=============================== test session starts ===============================
platform darwin -- Python 3.6.1, pytest-3.0.7, py-1.4.33, pluggy-0.4.0 -- /Users/Justin/anaconda/bin/python
cachedir: .cache
rootdir: /Users/Justin/git/programming_bootcamp/2017/lessons, inifile:
collected 5 items

test_seq_features.py::test_n_neg_for_single_E_or_D PASSED
test_seq_features.py::test_n_neg_for_empty_sequence PASSED
test_seq_features.py::test_n_neg_for_longer_sequences PASSED
test_seq_features.py::test_n_neg_for_lower_case_sequences PASSED
test_seq_features.py::test_n_neg_for_invalid_amino_acid PASSED

============================ 5 passed in 0.03 seconds =============================
Obviously, this is not a very robust fix; it only works if the invalid amino acid is Z. We need a smarter way to fix this. What about using the bioinformatics dictionary from before?
import bioinfo_dicts

def n_neg(seq):
    """Number of negative residues a protein sequence"""

    # Convert sequence to upper case
    seq = seq.upper()

    # Check for a valid sequence
    for aa in seq:
        if aa not in bioinfo_dicts.aa.keys():
            raise RuntimeError(aa + ' is not a valid amino acid.')

    # Count E's and D's, since these are the negative residues
    return seq.count('E') + seq.count('D')
running pytest one more time:
$  pytest -v
============================ 5 passed in 0.03 seconds =============================
Justin@JBMacBook [~/git/programming_bootcamp/2017/lessons]
% py.test -v                                                                 (618)
=============================== test session starts ===============================
platform darwin -- Python 3.6.1, pytest-3.0.7, py-1.4.33, pluggy-0.4.0 -- /Users/Justin/anaconda/bin/python
cachedir: .cache
rootdir: /Users/Justin/git/programming_bootcamp/2017/lessons, inifile:
collected 5 items

test_seq_features.py::test_n_neg_for_single_E_or_D PASSED
test_seq_features.py::test_n_neg_for_empty_sequence PASSED
test_seq_features.py::test_n_neg_for_longer_sequences PASSED
test_seq_features.py::test_n_neg_for_lower_case_sequences PASSED
test_seq_features.py::test_n_neg_for_invalid_amino_acid PASSED

============================ 5 passed in 0.03 seconds =============================
Hurray! Everything passed beautifully.
Summary of TDD
Now that you have some experience with TDD and have an idea about what it is and how it works, let's formalize things by writing out the basic principles of test-driven development.
- Build your software out of small functions that do one specific thing.
- Build unit tests for all of your functions.
- Whenever you want to make any enhancements of adjustments to your code, write tests for it first.
- Whenever you encounter a bug, write tests for it that reproduce the behavior and then fix the code to make the entire test suite to pass.
Continuous Integration.
Fine. Now you can write tests and functions that can pass those tests and push all that to a git repository so other people can use it too.
However, one of the most important forces behind software development is collaboration. Chances are that even in small projects you will collaborate with other people during development or that another researcher will suggest changes in the future.
This is where continuous integration(CI) comes to play.
As you will probably reuse thousands of lines of code written by someone else in your program (have you stopped to think how many lines of code are invoked when you write import numpy?), others will also benefit from the lines of code you are writing right now. To make sure your code is up to snuff, the software community developed the concepts around unit testing and to facilitate collaborative work they developed git. CI is the combination of the two... continuously.
Ideally every time someone submits changes to the remote repository (git push) somebody else checks the code by first running all the tests again and making sure it does pass them all. CI is the automation of this ideal.
Here we will use one of the services available in GitHub for CI called Travis CI. Since CI is to simplify our lives, the folks from Travis and GitHub made the integration as easy as possible. So let's put the program that we just wrote in CI.
New Travis CI account.
First, go to the travis-ci.org and sign up with your Github account.

Then, authorize the Travis app:
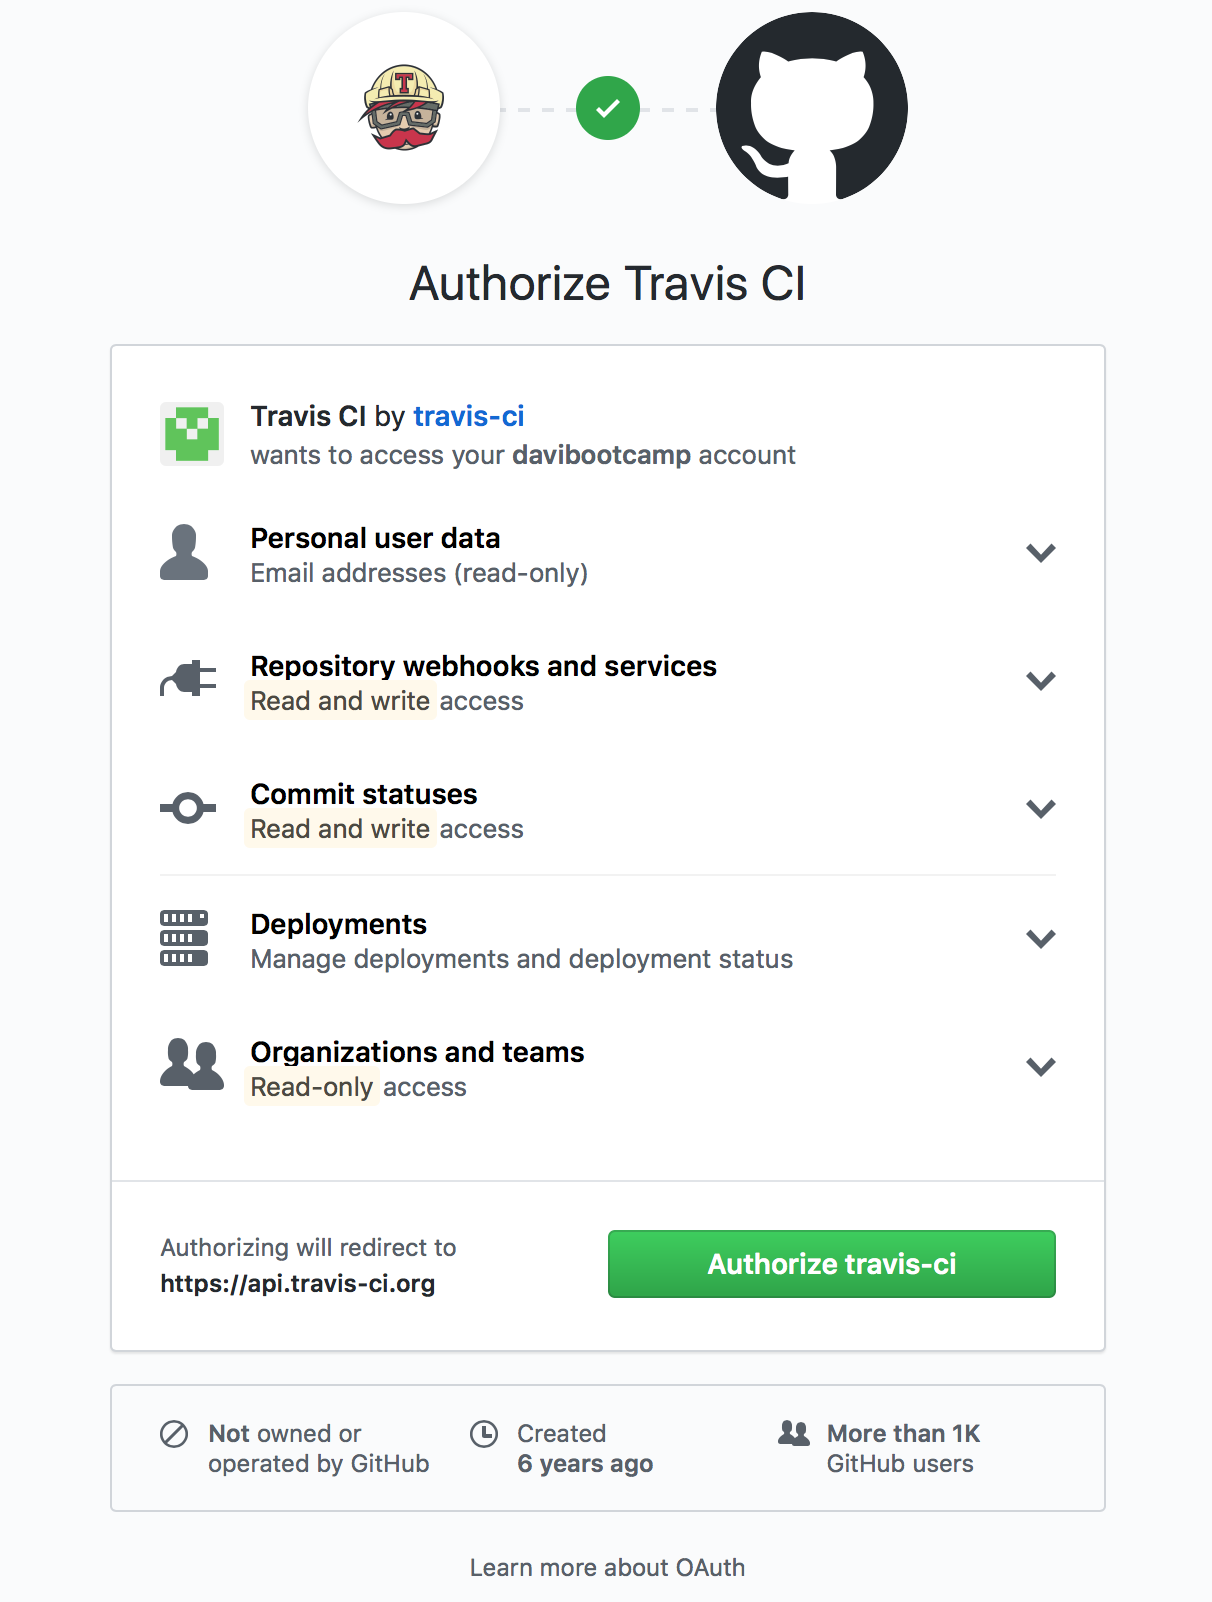
and then you now have your own page at travis-ci.org. Great. But it looks fairly empty there. We will come back to this.
Recap on how to make a new repository on Github
Because we're now going through the process of setting up CI for a repository, let's recap how to set up a new repository hosted at GitHub. Chances are that your working directory is full of other scripts and whatnot. Let's start a new one for the sake of organization.
Go to your Github page and click in new repository and give it a name. For this demo, we will use protfeature as our name.
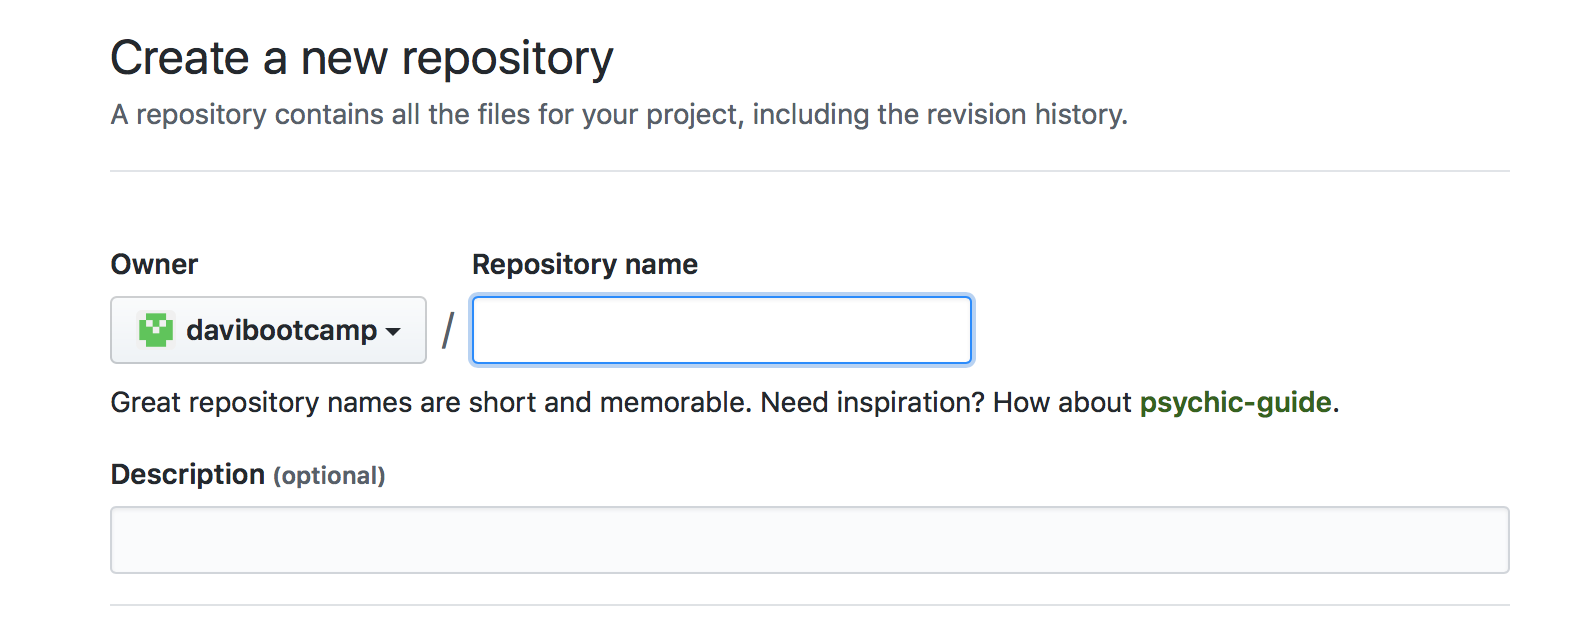
and let's initialize the repo with the default specs:
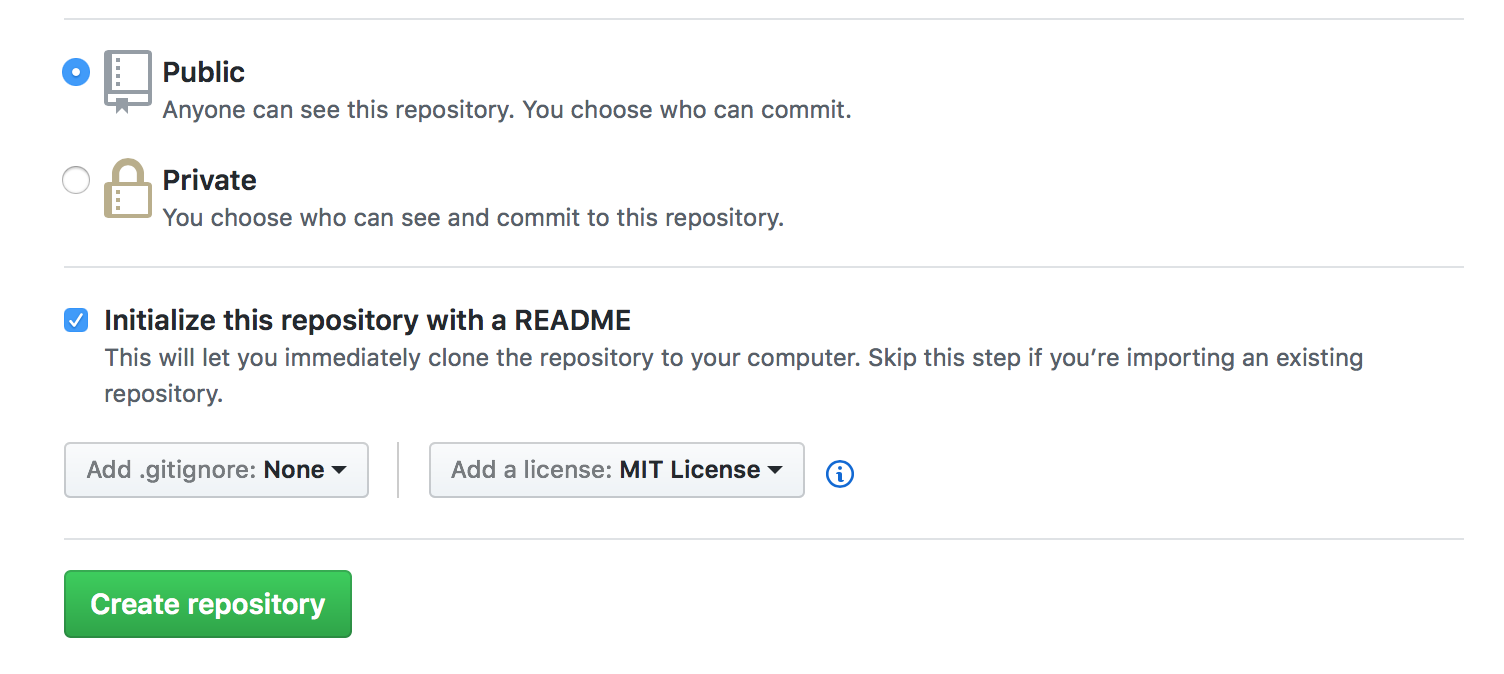
Now, let's clone this repository into our own machine with $ git clone and copy the programs seq_features.py, test_seq_features.py and bioinfo_dicts.py to the directory created during cloning. If you followed our suggestion the name of the directory is: protfeature. Your directory should look like this:
-rw-r--r--+ 1 Justin  staff   1.0K Jun 15 22:38 LICENSE
-rw-r--r--+ 1 Justin  staff    13B Jun 15 22:38 README.md
-rw-r--r--+ 1 Justin  staff   1.0K Jun 15 22:36 bioinfo_dicts.py
-rw-r--r--+ 1 Justin  staff   428B Jun 15 22:36 seq_features.py
-rw-r--r--+ 1 Justin  staff   669B Jun 15 22:36 test_seq_features.py
before we proceed let's make sure this is working. pytest it!!!
$ pytest
=============================== test session starts ===============================
platform darwin -- Python 3.6.1, pytest-3.0.7, py-1.4.33, pluggy-0.4.0
rootdir: /Users/Justin/git/protfeature, inifile:
collected 5 items

test_seq_features.py .....

============================ 5 passed in 0.02 seconds =============================
Great! It works but you probably noticed that it generates a bunch of other files:
$ ls -l
total 56
-rw-r--r--  1 ortegad  staff  1068 Jun 14 12:49 LICENSE
-rw-r--r--  1 ortegad  staff    35 Jun 14 12:49 README.md
drwxr-xr-x  3 ortegad  staff   102 Jun 14 12:51 __pycache__
-rw-r--r--  1 ortegad  staff  1005 Jun 14 12:51 bioinfo_dicts.py
-rw-r--r--  1 ortegad  staff  1033 Jun 14 12:51 bioinfo_dicts.pyc
-rw-r--r--  1 ortegad  staff   423 Jun 14 12:51 seq_features.py
-rw-r--r--  1 ortegad  staff   601 Jun 14 12:51 seq_features.pyc
-rw-r--r--  1 ortegad  staff   841 Jun 14 12:51 test_seq_features.py
If you do a git status all these files will be there waiting to be staged:
$ git status
On branch master
Your branch is up-to-date with 'origin/master'.
Untracked files:
  (use "git add <file>..." to include in what will be committed)

    .cache/
    __pycache__/
    bioinfo_dicts.py
    bioinfo_dicts.pyc
    seq_features.py
    seq_features.pyc
    test_seq_features.py

nothing added to commit but untracked files present (use "git add" to track)
That is where .gitignore comes into play. Let's not clutter our repo with all these other files that will be generated anyways.
Make a new file called .gitignore (the dot here is important) and put the following in it:
.cache/
__pycache__/ # There are two '_' in the beginning and at the end of this name
*.pyc
This tells git to ignore files with extension .pyc and the directory __pycache__.
$ git status
On branch master
Your branch is up-to-date with 'origin/master'.
Untracked files:
  (use "git add <file>..." to include in what will be committed)

    .gitignore
    bioinfo_dicts.py
    seq_features.py
    test_seq_features.py

nothing added to commit but untracked files present (use "git add" to track)
Alright! Much cleaner! let's stage, commit and push:
$ git add .
$ git commit -m "Initial commit of protfeature"
$ git push origin master
Take a look at the page of your repository on github and these files should be there already. Now we are ready for CI.
Travis CI interface.
Go to travis CI webpage and you should be seen something like this:
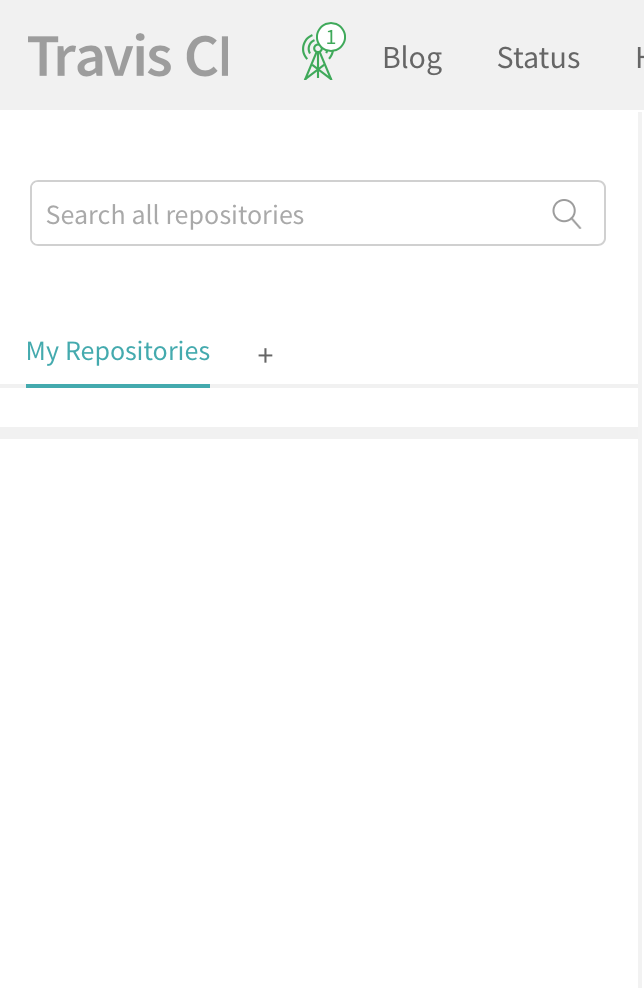
click on the + sign left of My repositories. That will take you to a page listing your repositories on GitHub (if you don't see anything, click in Sync account).
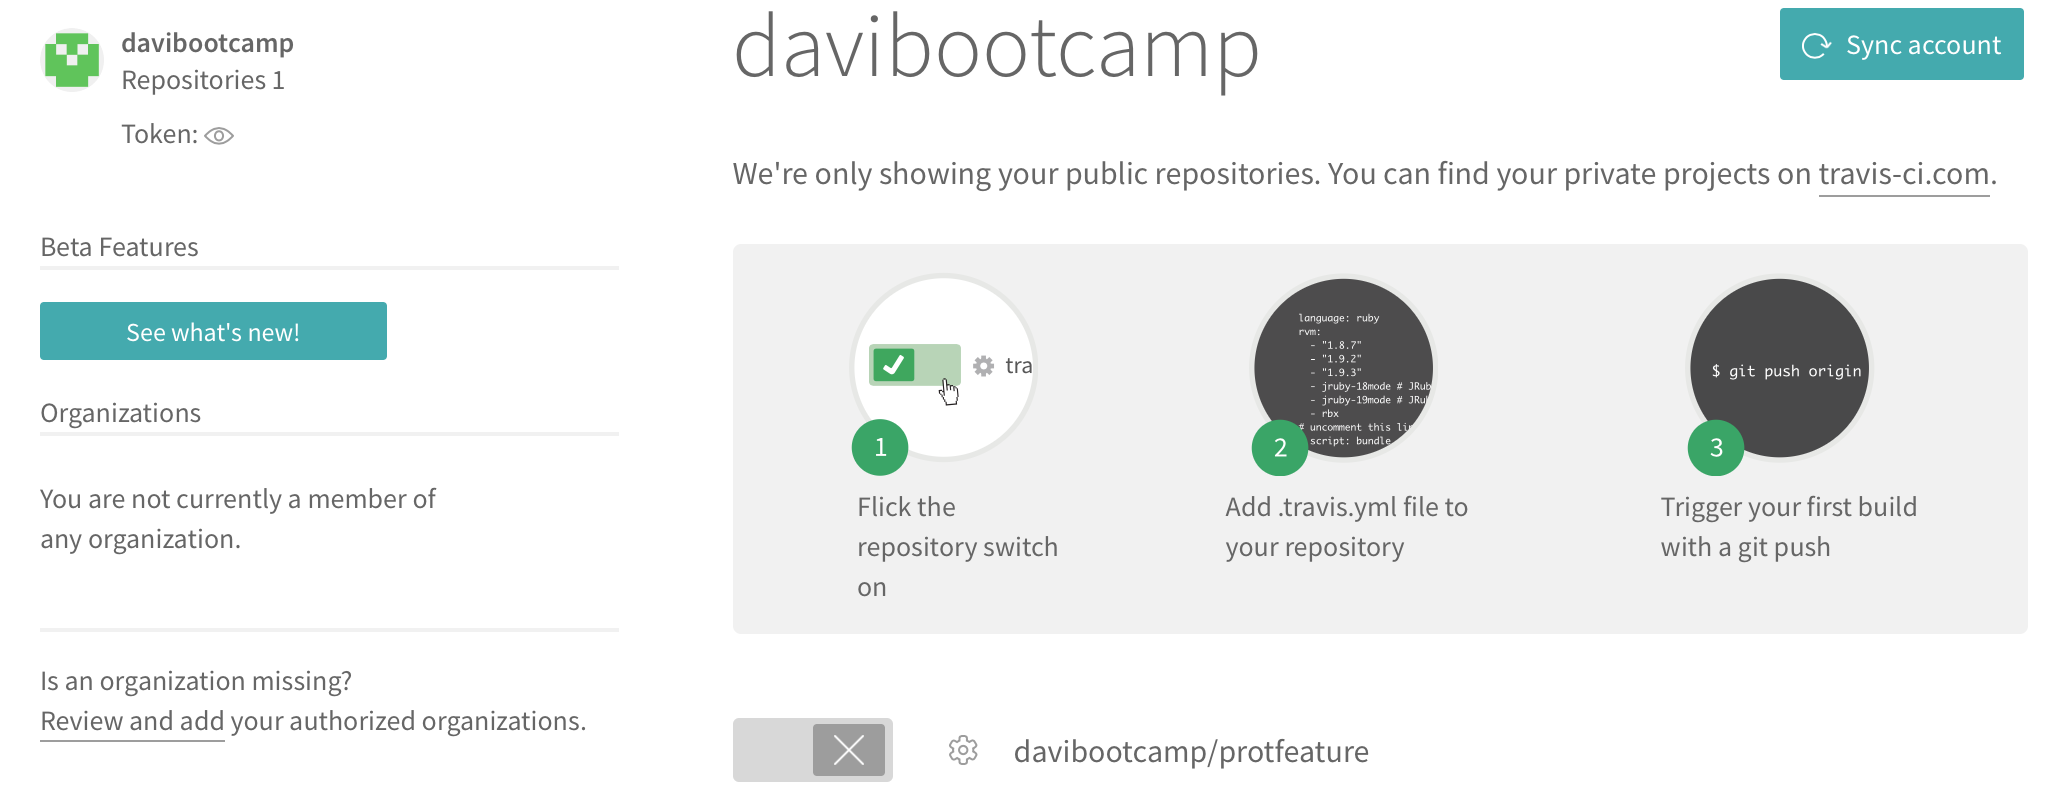
Toggle the CI for the repository we are interested in.

Go back to the home page on Travis CI and your repository should be listed there now but nothing happens. That is because we haven't told what Travis should do. Travis CI reads a .travis.yml file in the main direction with instructions on what it should do with your code. (The suffix .yml indicates that this is a YAML, pronounced "yammal" file, an acroynm for "Yet Another Markup Language.") Let's make the .travis.yml file:
yml
language: python
python:
  - "3.5"
  - "3.6"

# command to install dependencies

# command to run tests
script: py.test
This is probably the simplest .travis.yml possible. It tells which language our software is written oi, which versions should be able to run it and the testing command.
Because we are not using any dependencies, there is nothing in the section command to install dependencies but if you have import numpy in your code, for example, you should include a line there saying something like: pip install numpy. If you have many dependencies, you should probably think about writing a setup.py file and use pip to help you keep track of all of them. This is a bit beyond the scope here, but if you are interested check out pip freeze.
Now that you have added .travis.yml, add, commit, and push. Now, go to the Travis page and you should see something like this:
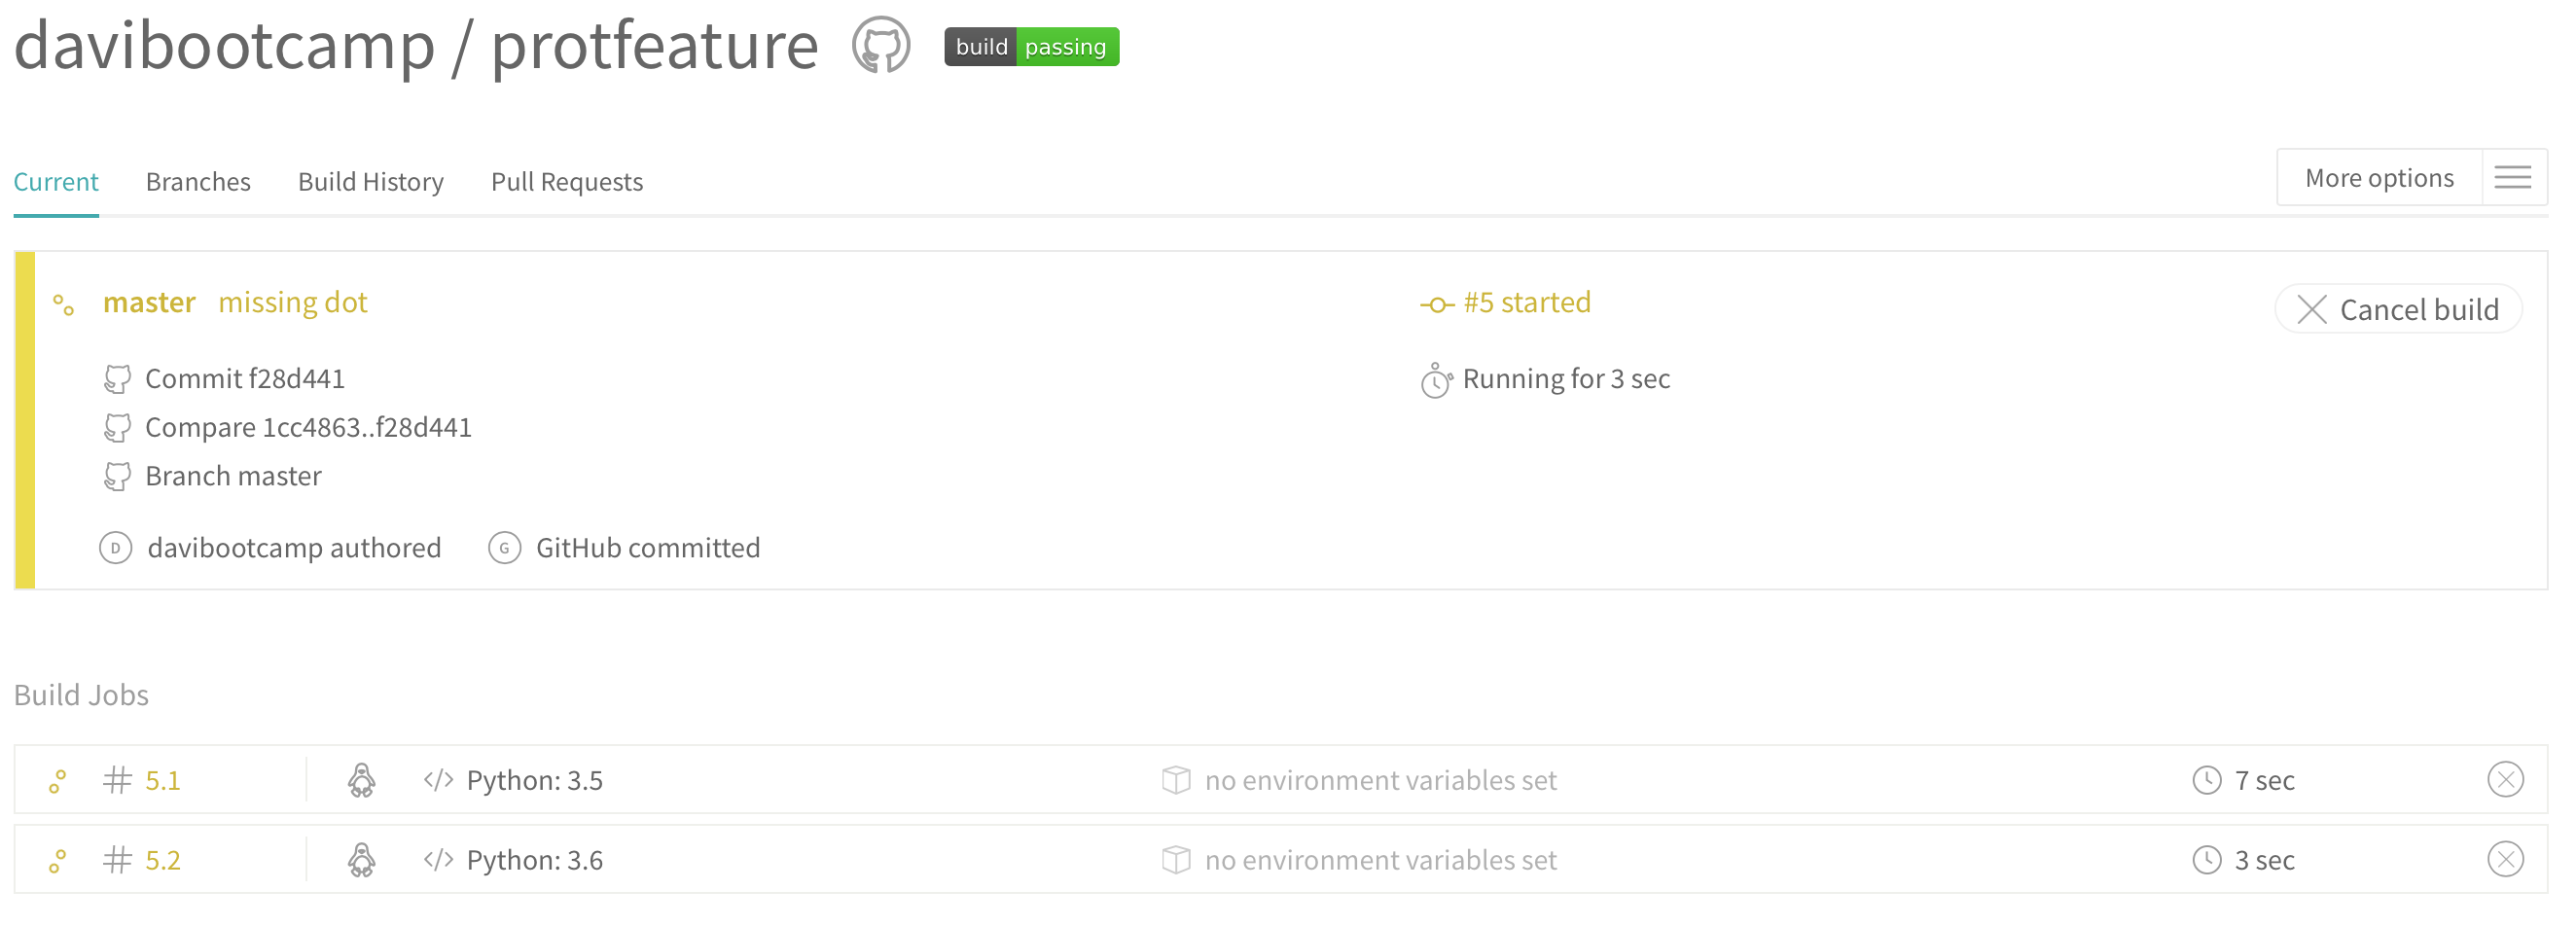
This is Travis cloning your repository and running your tests for you. If everything passes you should see something like this:
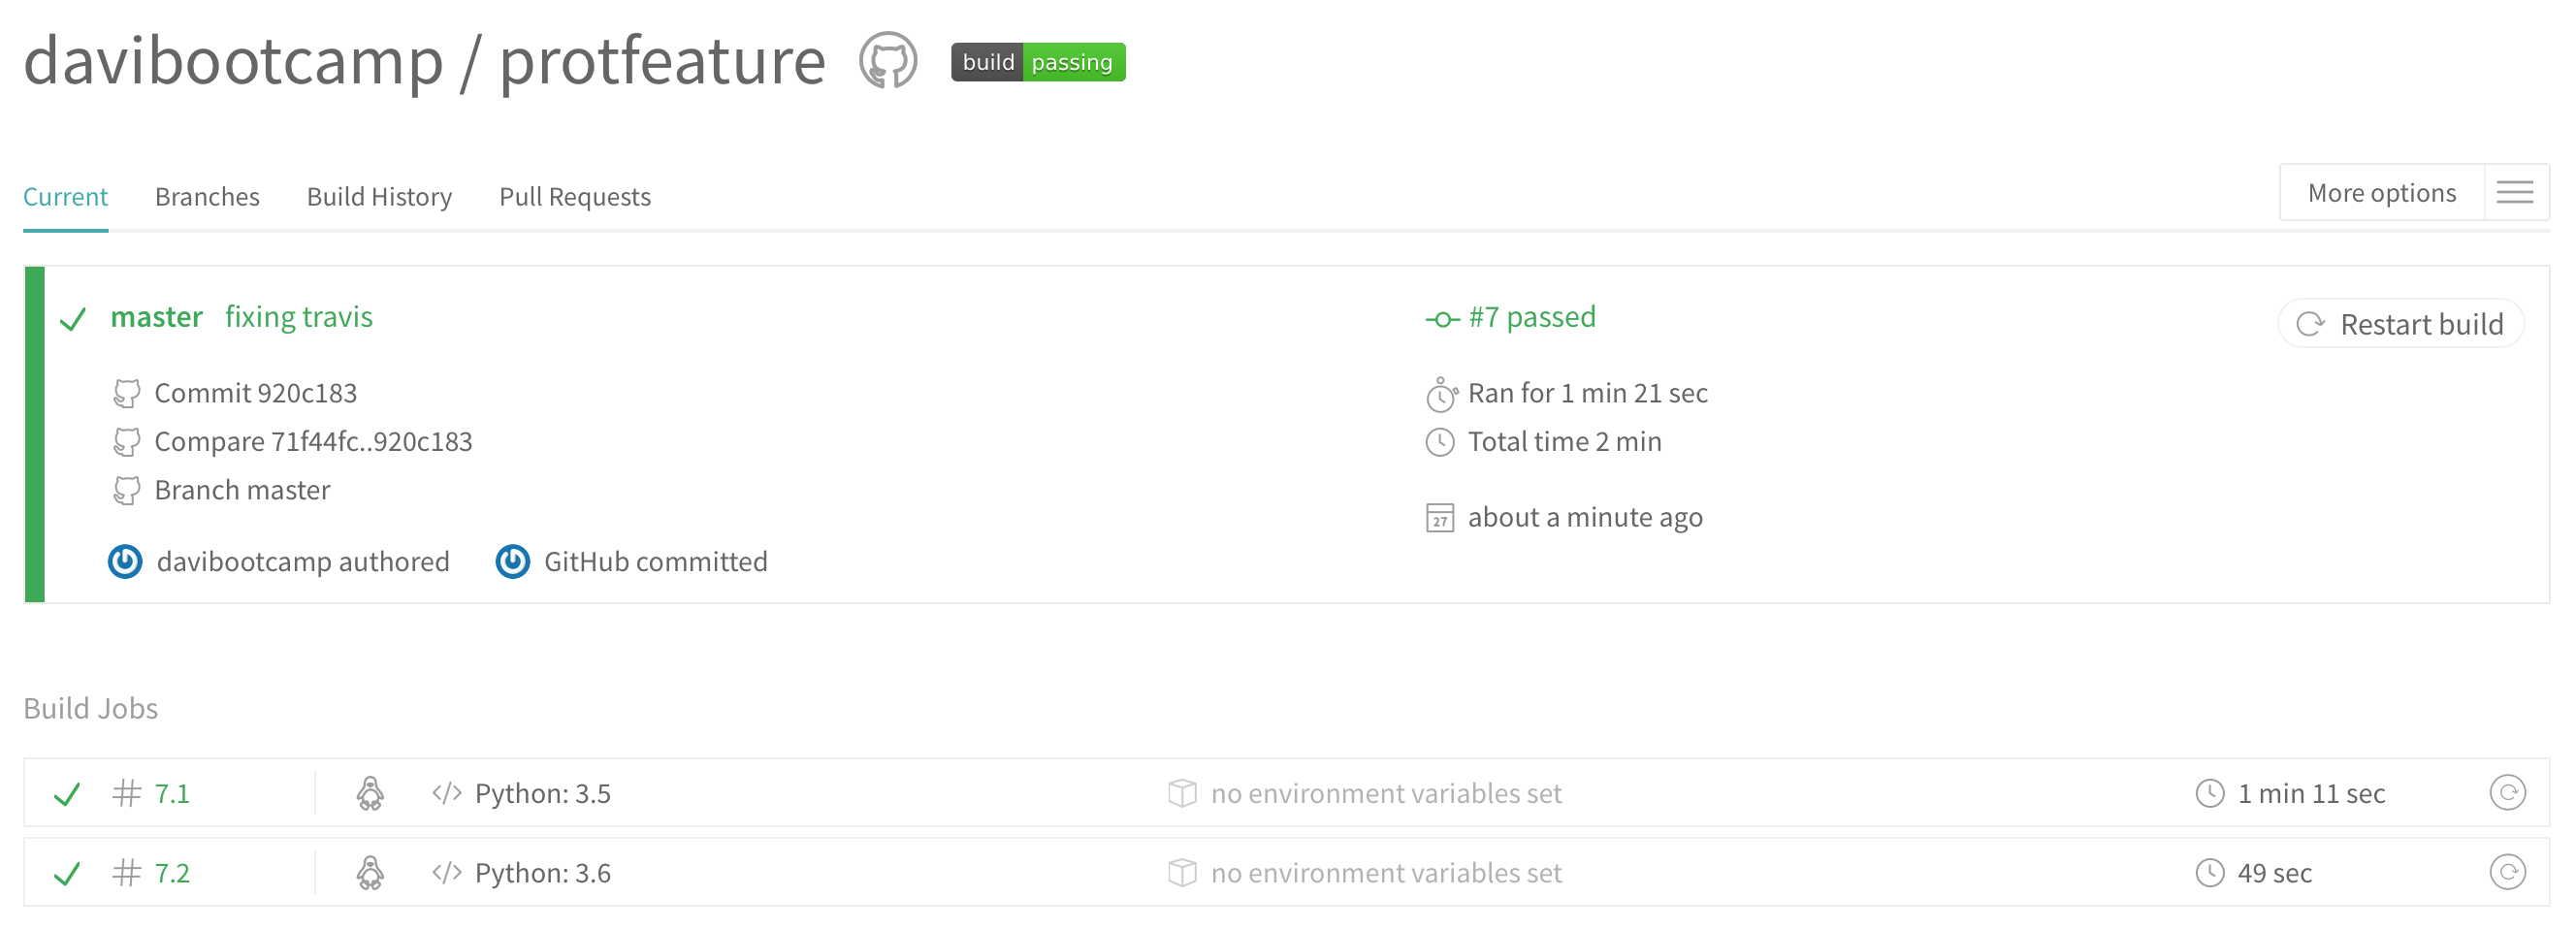
and if it fails:

You can also let people know if the current version of our program is passing the tests or not. For that, click on the badge build on the Travis page, select Markdown, copy the text and paste it on the README.md page on your repository.
Next time you render the README.md page, it should look like this:
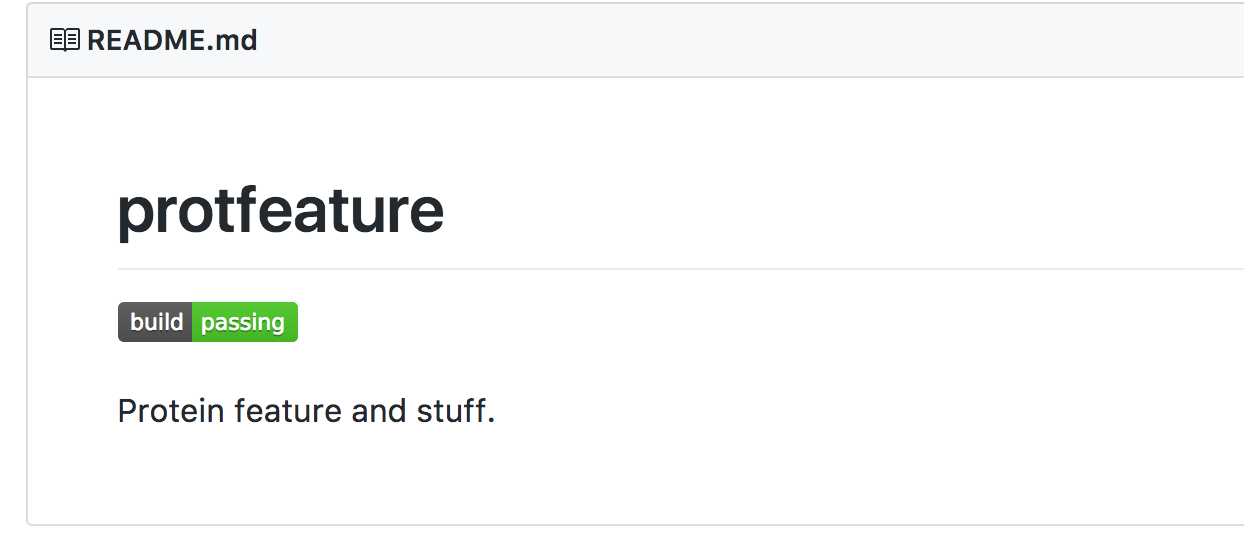
There, now your program is in continuous integration and everytime you receive a pull request, GitHub will let you know if their implementation passes all the tests.
Where do we go from here?
There are tons of details about pytest and travis-ci that will address most issues you will encounter while working on your program. Both of them have very good resources on their page and are well documented.
This lesson was heavily based on Katy Huff's Software Carpentry Tutorial and our own experience. Check it out for more details on TDD and CI.
Finally, the next real step is for you to learn how to package your program and publish it (possibly on pypi.python.org, or just hosted on GitHub). An interesting shortcut for that is to use the Cookiecutter PyPackage.
Have fun, and always test and share your code.